
Guideline for Production
These guidelines exist to make sure people can cook with confidence from what you’ll shoot. Please read this guideline thoroughly, as some instructions are mandatory for your content to be approved on our platform.
At the end of this walkthrough we provide a checklist of the fundamental steps to follow to make sure your content is approved.
Let’s get started.
BASICS
Cover + Intro + Steps
First things first, and most important of all: your content must be shot vertically. You'll need to capture videos and photos, and CREME Studios will then edit and publish them for you.
Cover

A photo of the recipe, the first impression that will draw people in.
Intro
Short intro of the recipe through mouth-watering scenes.
Steps

Step-by-step through short videos of up to 15s per step.
PRE-SHOOT
Required gear
1. Camera
You can film with pretty much any professional DSLR, Mirrorless or even Cinema Camera for CREME. As we have shootings happening all around the world from producers with different cameras and levels of expertises, we ask everyone to film using a standard/Rec.709 color profile, with no custom Picture Profiles, not only it is easier for you to monitor your shoot if you don't own an external monitor and don't have experience exposing in LOG, but it's smoother for the edit team to achieve a consistent grading over each and every recipe.
SPECS
File Format/Codec: MP4 or MOV, either 8 bit or 10 bit. Avoid heavy codecs, such as ProRes 422
Color profile: Standard/Rec.709, with no custom Picture Profiles (for Sony cameras, turn off Picture Profile)
White balance: Manual, between 4800K to 6200K depending on the lighting, location, weather and camera used
Resolution: 4k if possible, 1080p minimum
Frame rate:
• 24fps for the chef/dish’s intro and steps
• Highest frame rate available for B-roll, 120+ if possible
Shutter speed: Follow the 180° Shutter Rule: shutter speed should be set to double your frame rate to achieve a more natural motion blur (1/50th of a second at 24 fps, 1/60th of a second at 30 fps, 1/125th of a second at 60fps, etc).
ISO: Shoot with your camera native ISO or the lowest possible while maintaining a proper exposure.
2. Lenses
We recommend 50mm upwards. Remember to consider the camera sensor size when choosing your lenses. Don't use fisheye or anamorphic lenses.
TIP 💡
Clean lenses with a microfiber cloth (never with your finger!).
3. Lights
Natural daylight is your ally and you'll get the best result filming by a window. But if the location doesn't have windows or it's not possible to film during the day, any professional diffused lighting set will work. Be sure that the steps are well-lit throughout the entire filming process.
Natural light
Artificial light
TIP 💡
When using artificial lighting as key light it is advised to use reflectors or bouce boards directly opposed to your light source as fill
4. Tripods
Any tripod that can get the camera positioned for vertical shooting is recommended to avoid shaky footage. There's no need to film any top-view content.
5. Audio
The only deliverables that require audio are the recipe/dish's intro. Have a lavalier microphone or directional microphone and boom stand close to the chef to avoid background noise, while keeping the peaks below -6dB to avoid clipping.
6. Cooking appliances & prep tables
Talk to the chef about procuring a portable cooktop and prep table for the shoot day, to ensure you can record any step by the side of a window. Most kitchens don’t have windows next to the ovens, or you may be cooking in a space with a countertop that cannot be moved, so it will be important to ensure that you have flexibility to move around in the space.
Where to shoot
Talk to the chef to understand the space in which you'll be shooting, and look for windows to take advantage of natural lighting if possible.
Lighting
Turn off all ambient lights, avoid mixing lighting temperatures
Whether you're using the window or artificial light, use the light to your advantage by positioning the chef near and to the side of the light source. That way the food is not backlit and they won't shade the plate. Also, side light is a very common type of lighting that's flattering for gastronomy photos and videos. Just remember that the food MUST ALWAYS be well lit, as food in the dark is not appetizing at all.
Do's
The chef is by the side of the window, making the shot result flattering because it allows the viewer to better understand all three dimensions of the process.
Sidelight result.
Don't
The chef has her back to the window, so the light source comes from the back. Note that she's shading the process.
Backlight result
TIP 💡
If the chef is cooking outdoors, embrace the aesthetics, but avoid filming the countertop/table in shade if the background is sunlit

Natural light coming from a window by the side of the chef.

Artificial light coming from a LED light source with diffusion by the side of the chef.

Natural light while cooking outdoors.
Plan your content
Think about the cooking blocks of the dish as components and film them separately to maximize your shooting. For example, a spaghetti bolognese has multiple cooking blocks:
1. Fresh spaghetti pasta
2. Bolognese sauce
3. Pangritata
4. Spaghetti bolognese
One full dish and three cooking blocks; a vegetarian could cook the fresh pasta and the pangritata blocks, which gives better reach and range, and you don’t have to reshoot how to make fresh pasta for every new recipe that uses it.
When shooting make sure you don’t have any ingredients of another cooking block visible in the scene you're currently shooting, so the block can be reused to assemble other dishes.
Each step should be a single instruction that is straightforward and can be a single video clip without any cuts. The chef should only perform one action per step. The chef should write down the steps for each recipe with consideration to how each will be recorded, and share with you as part of shoot planning.
The goal is to maximize the shoot to produce as much video content as possible, filming complete dishes with multiple cooking blocks.
TIPS 💡
• You should be able to shoot between 6 to 10 cooking blocks per shoot day, a full dish can have from 2 to 6+ cooking blocks
• A part of a dish can become additional content. For example: preparing the onion for the bolognese sauce can become a video on how to make a brunoise cut. A seafood dish can also become a tutorial on how to clean and prepare an ingredient, e.g., a shrimp or a lobster.
• If a dish, or a cooking block, has a step that takes too much time to cook or to cool down, think of blocks or quick dishes that can be done in the meantime, or have the final state prepared in advance so you have the before and after.
Content Strategy
High Engagement
• Easy recipes
• Recipes with 12 steps or less
• Recipes with 6 ingredients or less
• Vegetarian recipes
• Vegan recipes
Low Engagement
• Recipes with 12 ingredients or more
• Recipes with 36 steps or more
• Recipes with expensive ingredients
• Recipes that rely on professional equipment
• Mayos (vegan and flavored options are fine)
• Simple syrups
• Brown butter
Written recipe
The chef should share drafts of the written recipes with you ahead of the shoot day (including ingredients, amounts, steps, and equipment necessary,) to assist with planning. The written recipes will help you align with the chef on the content that will be shot, and the order with which it will be filmed. The written recipes will need to be delivered to Creme along with the raw footage from the shoot itself.
SHOOT-DAY
Before turning your camera on, please check with the chef if they have already filled the Chef's Profile Form, as this form guarantees that the chef consents on being shot and any behind the scenes shown on our social media. If the chef hasn't filled the form yet, please ask him/her to do so while you get the set ready
Elements to capture
Remember to capture these five elements during the shoot, for each recipe that is being filmed:
• Chef's portrait + restaurant photo: portrait of the chef, either posed or in-action, and a photo of the restaurant;
• Steps: video of the entire recipe from start to finish;
• B-roll: any content that could be used in the intro or to show results of a step, either images of unique ingredients, the stretch of a melted cheese, food beauty shots (sauce drizzle on top of the dish, an egg yolk running), the chef enjoying the dish, etc;
• Cover: photos of the completed, plated recipe, either a cooking block or a full dish;
• Intro: record the chef talking about the recipe (used in the intro);
Filming the recipes
Recipes must be filmed vertically at an oblique ¾ angle. Stick to the composition/framing as long as possible and avoid any camera movement while the chef is preparing the recipe.


Examples of oblique ¾ angle shots, vertically-oriented
If you need a tigher or wider shot, change the camera position only between steps. Composition in support of clear instruction always comes first.
It is fundamental that the steps are clear and it is possible to see what's being prepared. If the chef’s hands are obstructing the ingredient being chopped, ask them to change their hand position so it doesn't block the view of the process. When they are adding an ingredient to the pan, ask them to show the ingredient before adding it. If the recipe needs to be cooked on a tall pan, raise your tripod to a high ¾ angle, so it is possible to see inside


High ¾ angle.
TIP 💡
We recommend shooting steps in f4.0 or narrower, so the food won't get out of focus. For B-roll you can go as wide as you wish as long as you keep it in focus.
Center the action
Clearly show the step-by-step process in the center of the composition, so the food, equipment, and the chef’s hands are always in the shot—nothing else. Work with the chef to mentally mark a spot on the work surface and follow it throughout the recipe.
The grid function can help a lot
TIPS 💡
When shooting with appliances, such as a blender or cocktail shaker, remember to center the composition on the action that's being facilitated by the appliance, not on the appliance itself.
Pause recording between large steps in the recipe, to make sure your footage is being saved and to make small compositional adjustments if necessary.
B-roll
When the chef achieved a specific result on a step or when the dish is done, record some B-roll: whimsical, slow motion scenes of the chef showing the tenderness of the meat, how stretchy the dough is, pouring the sauce onto the plate, a soft yolk running, etc. If the chef feels comfortable showing their faces you can film them plating, enjoying a bite, laughing. You can use more creative angles, tighter shots and even shoot handheld if you feel secure! If not, keep shooting with the tripod. Make sure to record these at the highest possible frame rate while keeping the ISO low as to avoid noisy footage.
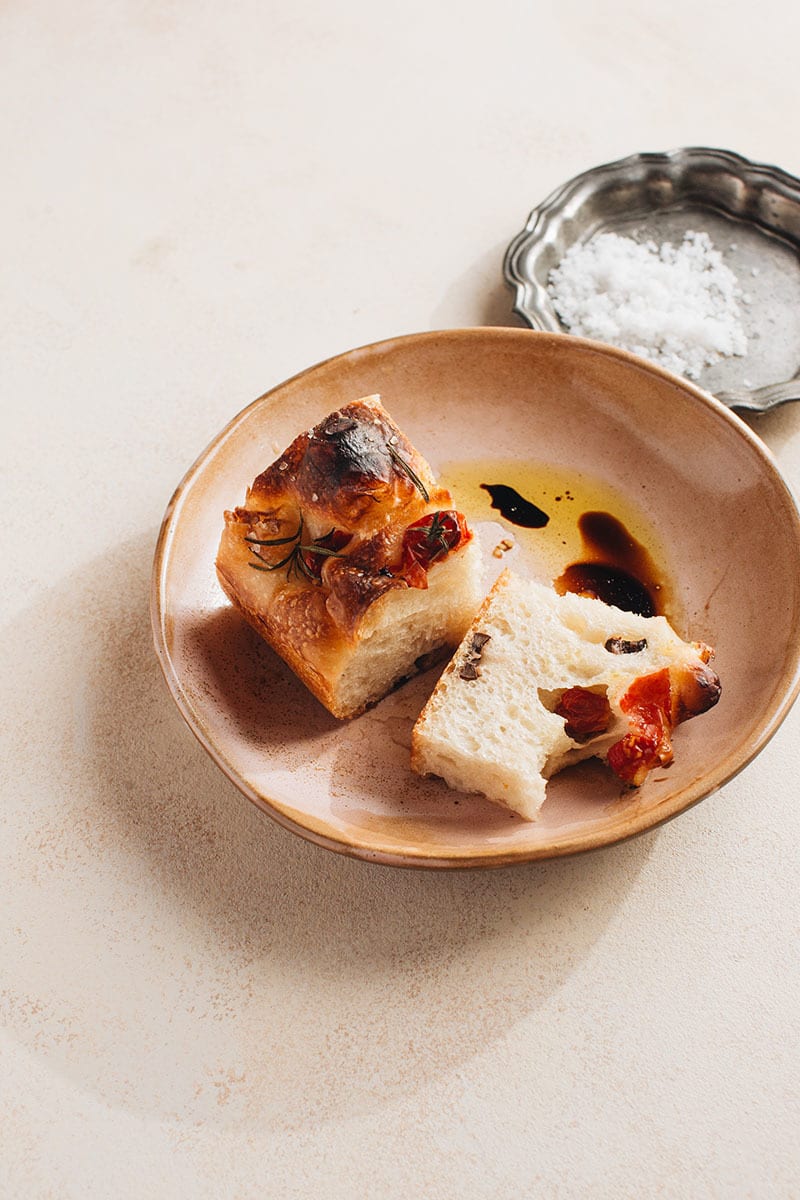
The crispy crust, arriving with the focaccia ready on the bench, cutting squares, stacking the squares
Adding olive oil to the dish, balsamic, adding salt, putting a slice in the oil.
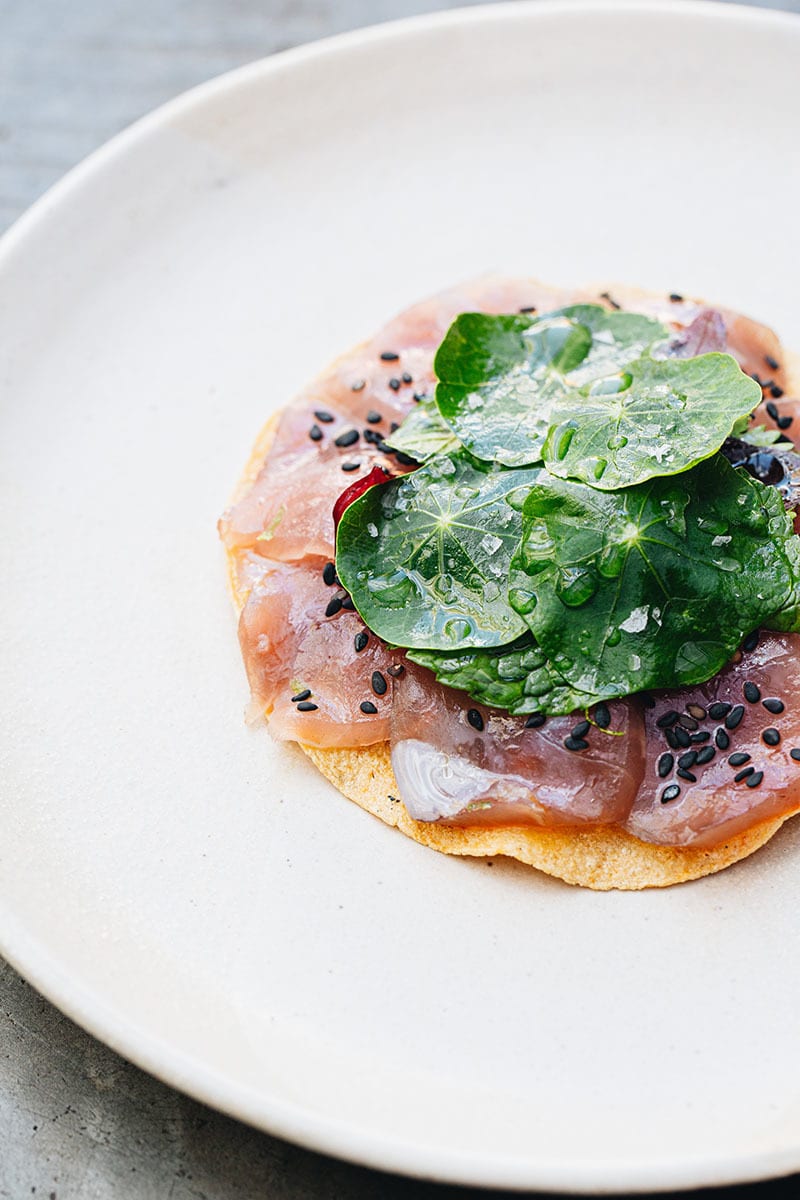
A scene showing the chef’s face while he finishes the dish
The chef tasting his own dish
TIPS 💡
When shooting drinks or beverages you can ask the chef/mixologist to repeat the same drink preparation twice, as they are really fast to mix, one so you can shoot steps footage, the second to shoot only b-roll.
When edited, each step will be 15s max, but you don’t need to have this time restriction in mind while recording, as the recipe should be cooked at its own pace. Our editing team will do its magic.
Teaching a recipe step-by-step
One step at a time.
Each step should only have one action. The chef shouldn't slice and mix at the same time, they should slice and then mix as separate steps. The chef should not flow immediately from one step to the next, as it can visually blend two steps and create confusion for the viewer.
Execute step. Pause. Repeat.
If it is a part of the recipe’s process, like resting, freezing, pre-heating, chilling, it must be filmed. So remember to capture food coming in and out of the refrigerator or the oven, and even small details such as the oven/stove knob when the chef changes it's temperature
Set an action spot to show results.
Please ask the chefs to, when they handle an ingredient to be shown after a certain action, to always handle it closer to the agreed-upon action spot, so it stays inside the camera’s focus range. When the chef explains the desired results that the step is trying to achieve — like smoothness, golden brown, crispiness, etc. — always show the result so viewers have this as a reference to compare against what they are doing.
Show how to plate the final dish.
The chef should show how to plate the final dish — the grand finale, the beauty shot. We need at least one plating shot, but feel free to do multiple ones if you'd like. The chef can also show different ways to plate in different containers. Each different plating should have its own video clip.
Cover photo, chef's portrait & restaurant photo
The cover photo is the first look someone will have at your content—it should entice people to cook the chef’s recipe.
All shooting and lighting recommendations apply to the cover photo, including lighting from the side—either natural, artificial, or outdoor—and taking care not to photograph the plate in the shade while the rest of the composition is in sunlight.
We recommend at least 3 different angles: ¾, top view, and front view. But feel free to also explore other angles.


If you want to set up a scene specifically for the dish, feel free to do so. Unlike the recipe footage, the cover photo can be more illustrative.


Think about the height, dimension and colors of the dish, which angle and lighting will favor it's characteristics? A backlit drink can emphasize it's colors for example:


Remember to photograph not only the final dish plated, but the dish’s blocks as well. If the cooking block is a liquid, like a broth or sauce, an action shot like spooning it with a ladle is better than photographing it in a bowl or a jar.


Examples of cooking blocks covers: "cleaning squid", "grilled squid", and "garlic cream"
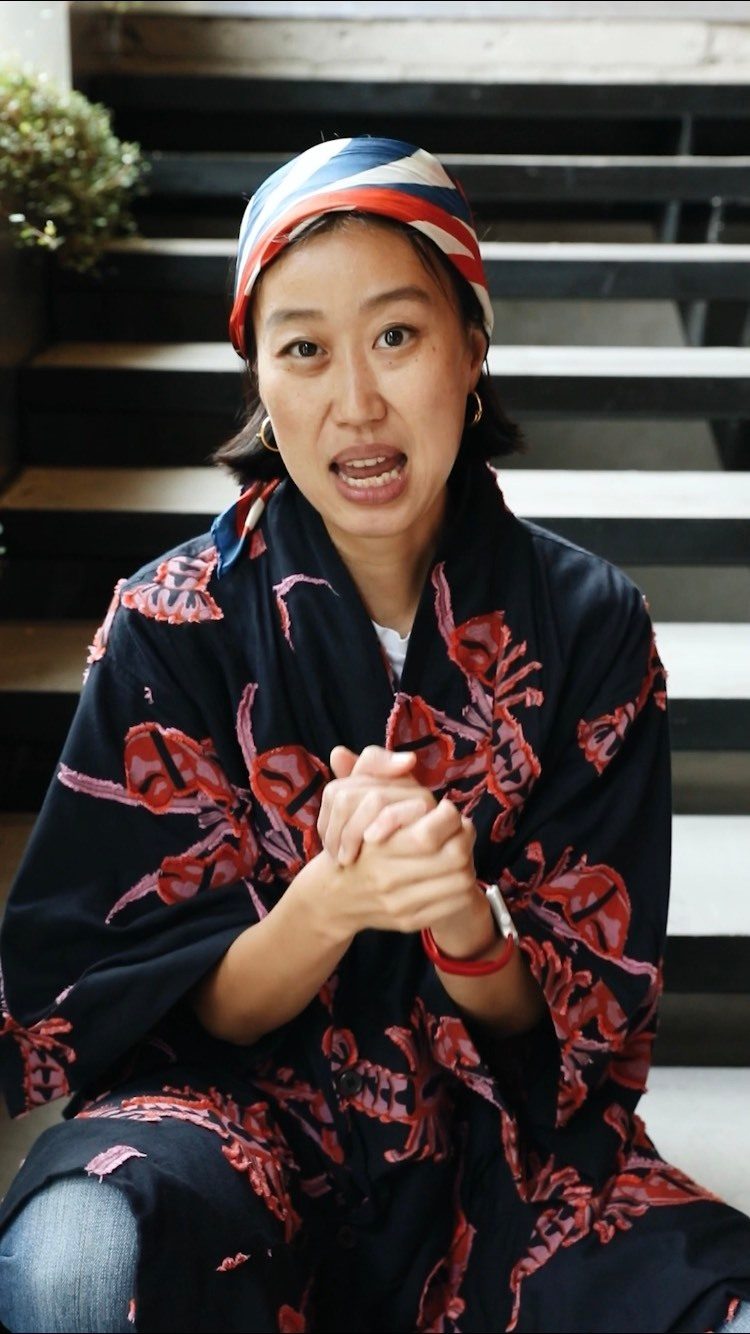
Avoid close-ups for the chef’s portrait, shoot medium to medium-wide and give preference to darker backgrounds when possible for brand consistency. We recommend shooting at least 3 options.


Examples of portraits on the app
Examples of restaurant photos on the app
For the restaurant photo, it can be either a picture of it's facade/ambient, a shot of the chef or chefs in front or inside the restaurant, or even a picture of a table full of dishes. If you're shooting a private chef, you only need the chef's portrait


Do's
Center the dishes or blocks cover composition so their title won't block the photo


Don't
Frame the dishes or blocks cover on the low end of the composition


Chef’s and Recipe's intro
Follow the same lighting recommendations to light the chef's face, but feel free to guide and position the chef in whatever way that will make them comfortable: stood up behind the counter, seated down with a glass of wine, etc.
Recipes: All recipes and cooking blocks have a short (1-min max) trailer edited by our team using the footage you deliver. Remember, it’s about the block/dish, not the chef, so they do not need to introduce themselves at all, they can go straight into the recipe. Here are 6 questions that can be asked about each recipe:
1 - What is it? Tell us more about this block/dish
2 - What do you like about this block/dish and when do you normally cook it?
3 - When was the first time you prepared it?
4 - Any funny stories or special memories associated with it?
5 - What is your inspiration?
6 - For what occasion?
Here's a recipe intro for Æbleskiver, by chef André Skjødt Andersen.
Chef's Intro: 5 questions to ask the chef that must be answered for intro video be made, focus on the chef, not the restaurant:
1 - What is your name and when did you decide to become a chef/work with food? Tell more about your journey into cooking
2 - Where have you learned to cook and what's your cooking experience?
3 - What is your cooking philosophy?
4 - What is your culinary inspiration?
5 - What do you enjoy cooking the most?


If the chef prefers not to appear on camera or if the shooting location is too noisy, we will edit using footage from the recipe and a background track.
TIPS 💡
• If you don't have a clapperboard, clap your hands before recording the interview. The audio spike will help our editing team sync the audio.
• Audio quality is fundamental. If you’re not using a lavalier microphone, try to get the mic as close as possible to the chef to avoid unnecessary noise or echo, while keeping the peaks below -6dB to avoid clipping
POST-SHOOT
Uploading the content
Don't cut, edit, grade, or apply filters — only deliver the raw footage on a rec709 profile. Our team will do all the editing.
For photos, we ask that each producer selects and grades their own photos and upload both the selected RAW and graded JPG files.
We'll send you two Dropbox links: the first one, a File Request, where you'll be able to upload your content and a second one where you can check if the content was uploaded successfully. You have a deadline of two weeks to upload the content before the file request expires. If your link has expired please reach out to the CREME member you’re in contact with requesting a new folder
Upload your content with the following folder structure, identifying the recipes as either “dish” or “block”:
This way, we should have, for example: “RoastChickenwithSalsaVierge_dish”, “RoastChicken_block”, “SalsaVierge_block”
Do not duplicate the footage of a block inside the full dish folder, if the dish is just the assemble of its blocks, the steps folder should be only the assemble/plating.
There’s no need to rename the footage files, but it is crucial that you organize the files following the folder structure above, as our editing team won't be able to tell which files belong to each recipe if they are all in the same folder.
IMPORTANT: When you upload your files through Dropbox's FileRequest system, you won’t be able to edit or organize your files after the upload, so please organize your files & folders before uploading. Use the second link to check if all your files were uploaded correctly.
After you finish uploading your files, please notify the CREME member you’re in contact with that all files have been uploaded successfully.
Example:
• Chef/Restaurant name
• Chef/Restaurant Assets
• Personal Intro
• Chef’s Portrait
• Restaurant Cover
• Recipe folder followed by either "_dish" or "_block" (one folder per recipe that was captured)
• B-roll Assets
• Cover Image
• Introduction Assets
• Steps Assets


SUMMARY
Tips & tricks
• Ask the chef to deliver a draft of the written recipes to you before filming, as this can help a lot with planning for the shoot day.
• Shoot more than you need. Have extra footage—everything is material that we can use when editing. Remember to charge your camera and check that you have enough memory.
• Record every step with a high level of clarity. Shots should be focused on the chef’s hands and what they’re doing. Consider the area around them, including the cutting board or counterspace, and the space around any equipment the chef uses.
• Although recipes don't need to be shot cronologucally, continuity is important: lighting, set, clothing, appliances, etc
• Try to shoot a few seconds before and after the action so we have a bit of leeway when editing.
• When the chef uses a small container to add an ingredient to a larger one, ask them to add it with the front of the small container facing the camera, so as to not film the bottom of the small container.
• Instead of moving the camera, move things around to fit within the frame you initially set if possible. Rearrange the camera position only if you need more space in your frame for bigger equipment, or if you're moving to a new setup (such as the stovetop from the countertop).
• Avoid shooting slow-motion b-roll on darker sets, as the ISO must be raised to compensate for the high frame rate, which leads to grainy footage. In these situations, 60fps will suffice.
• Recipe blocks must follow the same rules as a full dish and be delivered with: cover, intro, b-roll, & steps.
Checklist
Please check that each of the items below applies to your footage, as these are non-negotiable for you content to be approved on CREME.
Chef delivers a draft of the written recipes to you before filming
Shoot location has natural light or diffused artificial light, & chef's workspace is well lit
Camera specs are set as recommended in guideline
Camera is positioned and recording footage in vertical orientation
Action is framed in the center of the composition
Camera is in position throughout the steps, avoiding unnecessary movement
All recipe steps are shot in a way that is clear to the viewer; chef's hands are not blocking the action, ingredients are shown before they're added to a pan
Desired results of the recipe must always be shown: temperature of the meat, smoothness of a broth, texture after mixing
If the recipe need to be cooked on a tall pan, raise your tripod to a high ¾ angle
B-roll footage is shot for each dish and cooking block in the highest frame-rate available
Remember to shoot steps, b-roll, and cover photo for each and every cooking block or dish, as well as the chef’s portrait
If possible, shoot some b-roll of the chef showing his or her face while cooking, plating, or enjoying a bite if they feel comfortable doing so
Audio conditions are suitable for the recipe introduction and are not clipping
Organize your files by recipe per the guidelines before you upload
Chef delivers a draft of the written recipes to you before filming
Chef fills the Chef's Profile Form before filming
Shoot location has natural light or diffused artificial light, & chef's workspace is well lit
Camera specs are set as recommended in guideline (remember to shoot with a Rec.709/standard color profile)
Camera is positioned and recording footage in vertical orientation
Action is framed in the center of the composition
Camera is in position throughout the steps, avoiding unnecessary movement
All recipe steps are shot in a way that is clear to the viewer; chef's hands are not blocking the action, ingredients are shown before they're added to a pan
Desired results of the recipe must always be shown: temperature of the meat, smoothness of a broth, texture after mixing. Shoot some b-roll of the desired result if possible
If it is a part of the recipe’s process, like resting, freezing, pre-heating, chilling, it must be filmed. So remember to capture food coming in and out of the refrigerator or the oven, and even small details such as the oven/stove knob when the chef changes it's temperature
If the recipe need to be cooked on a tall pan, raise your tripod to a high ¾ angle
B-roll footage is shot for each dish and cooking block in the highest frame-rate available
Remember to shoot steps, b-roll, and cover photo for each and every cooking block or dish, as well as the chef’s portrait and restaurant photo
If possible, shoot some b-roll of the chef showing his or her face while cooking, plating, or enjoying a bite if they feel comfortable doing so
Continuity and consistency is key: not only lighting, food and set, but chef's clothing, acessories and appliances as well
Audio conditions are suitable for the recipe introduction and levels are not clipping
Ask the following questions for the recipe's intros
1 - What is it? Tell us more about this block/dish
2 - What do you like about this block/dish and when do you normally cook it?
3 - When was the first time you prepared it?
4 - Any funny stories or special memories associated with it?
5 - What is your inspiration?
6 - For what occasion?
Ask the following questions for the chef's intro
1 - What is your name and when did you decide to become a chef/work with food? Tell more about your journey into cooking
2 - Where have you learned to cook and what's your cooking experience?
3 - What is your cooking philosophy?
4 - What is your culinary inspiration?
5 - What do you enjoy cooking the most?
Organize your files by recipe per the guidelines before you upload
Notify the CREME member you're in contact with after completing your upload
Print Checklist
